Sphero Flex

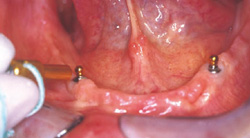
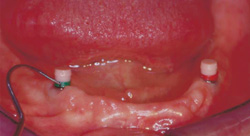
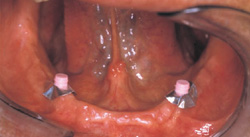
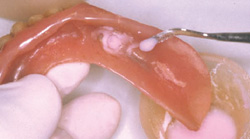
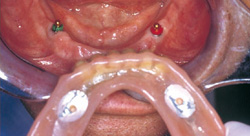
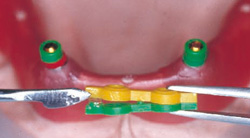
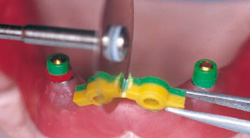
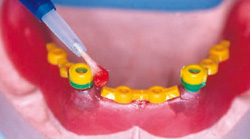
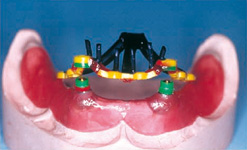
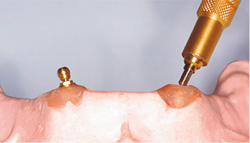
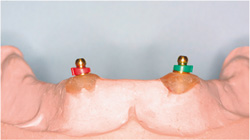
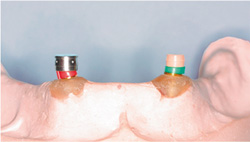
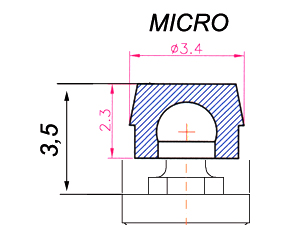
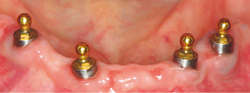
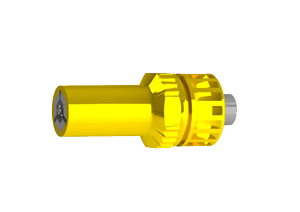
The Sphero Flex implant abutments for overdenture attachments are compatible with any implant system currently on the market. The Sphero Flex swivel ball comes with a diameter of 2.5 mm and is flexible to 7.5 in any direction. Sphero Flex has been designed to correct angulation problems up to 43° between two implant abutments.
This attachment is titanium nitrate coated and has a Vickers surface hardness of 1600. The female component of the attachment is a nylon cap that comes in a variety of colors and snaps over the ball to help prevent wear and increase retention.


product info
study
laboratory procedure
product specifications
Videos and Documents

Product Information

Sphero Flex


Sphero flex comp109

SPHERO FLEX

Ref. 109
• 1 Titanium Abutment with swivel sphere - 2.5 mm
• 2 Pink Caps - Soft Retention
• 1 Stainless Steel Housing for resin
• 1 Protective Disk
• 3 Directional Rings


Directional Rings For Sphero Flex and Sphero Block

Ref. 100AD
Kit Contains
• 3 Colored Rings With Inclination - 0°, 7°, 14°


Tools


Chiave Sphero block flex oro 771CEF chiusa

Key for Sphero Block & Sphero Flex

Ref. 771CEF
2.3 mm Hex


Chiave manipolo equator da-sola 760CE
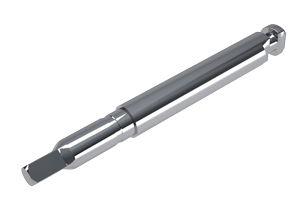
Hex Driver for Torque Controller - Contra Angle

Ref. 760CBM


Anti-Unscrewing System With Elastic Dowel

Ref. TE
Applies to Sphero Flex & Sphero Block

Studio

Screw in the attachment with the proper cuff height.  Tighten the screw as much as necessary. Unscrew and tighten again. Perform this operation 3 or 4 times to obtain a good fit.

Insert the directional rings under the spheres and then try in the appropriate retnetive cap.

Before processing it is advisable to remove the rentetive cap and insert a protective disk over the sphere and then replace the retnentive cap.

Try the prosthesis in the mouth and check if the spaces are large enough. Fill the holes with self-curing resin and position the prosthesis in the mouth.

When the resin has hardened, remove the protective disk and then remove any excess resin.

The finished prosthesis.

Laboratory

Directional rings (green) are positioned on the base of the attachment.

With the OT Box bar glued together, cut away any  excess and use only the part that will become the housing for the retentive cap. The OT Box must be placed on the plastic positioner.

Modeling phase: The OT Box housing is in position and connected to the other parts with self-curing resin.

The modeled reinforcement, finished  with wax and pins, to prevent breakage of the teeth.

The cast reinforcement on the model with metal pins for each tooth.

The finished  prosthesis with the retentive caps inserted in the cast housings.

Screw the abutment on the model and choose the appropriate cuff height.

Mount the directional rings and rotate them until you find the position that will achieve optimal parallelism.

Because of the elasticity of the retentive caps, they work very well if incorporated in the acrylic and/or in the pre-fabricated stainless steel housing. By using the stainless steel housing it is much easier to change the retentive caps.

The finished prosthesis with the stainless steel housing and retentive caps in place.

Product Specifications

Videos and Documents

product info
study
laboratory procedure
product specifications
Videos and Documents